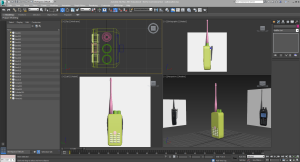
This lesson we looked into creating models that can help tell a story in a game. A walkie talkie is a good object to model as it can be used with sounds to communicate with an in-game character and tell a story. The sounds that I used for my walkie talkie can be found here.
Before I started modelling the walkie talkie I placed 2 planes with reference images from the front and the side to use the same dimensions. To crate the main body I started with a box and used the other tools like chamfering and bevelling to create the shape I wanted.
To add the dials at the top I created a cylinder and used more tools such as extrude to add the insets.
The antenna was created with a cylinder that I bevelled several times to match the reference image. The buttons were created with boxes that I edited with the same tools.
After adding the clip at the back, I textured my model using the UVW map and PhotoShop. The finished product looks like this:
Overall, this task was a challenge but I completed it easily because of the skills I learned from making previous models. I think my walkie talkie modeling went well as the model looks good and highly detailed. The texturing was also another level of detail that I added which was not difficult to add because of past experience. If I could add more to this model, I would spend time getting a more detailed plastic texture for the sides of the walkie talkie instead of solid grey to add yet more detail.


You outline the task quite well with a good use of screenshots to backup the points being made. \\your walkie talkie looks good and you even managed to get a texture on the front for the screen. You need to add an evaluation to this task. How did you find the production process? Was it difficult/easy? Were you happy with the final outcome and how did it compare to your initial intentions. If you could do it again would you change anything?
LikeLike
updated
LikeLike